One of the best and easiest ways to secure your emails and digitally sign them is by encrypting your emails using an S/MIME certificate. Emails encrypted using S/MIME cannot be read or accessed by any third party and can only be accessed by the intended recipient who has the correct key. These certificates give the sender and the receiver of the email assurance that the email has not been tampered with.
Similar to SSL/TLS certificates, S/MIME certificates use PKI and asymmetric encryption to encrypt emails. However, unlike SSL certificates that are installed on servers, S/MIME certificates are installed on client devices.
Here are the steps you need to follow to send encrypted emails from Outlook.
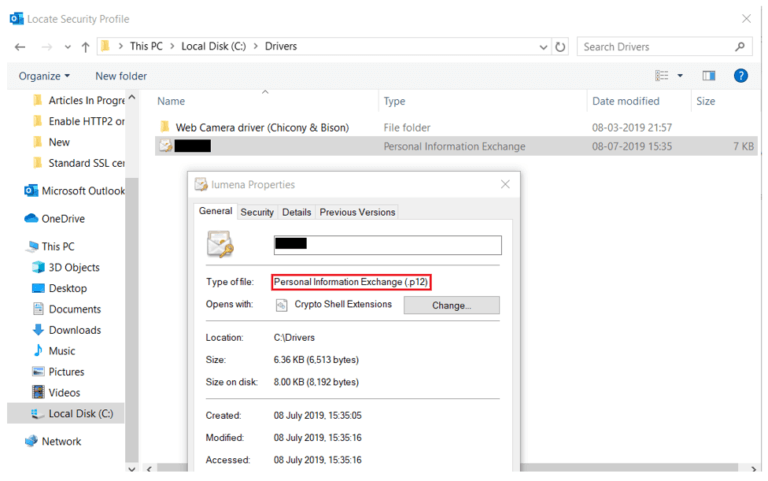
Before you start, make sure to download the PKCS#12 file and save it on your computer. Similarly, make sure to keep the password you entered while you saved your certificate file in a safe place. You will need this password while you install the certificate.
How to Install an S/MIME Certificate in Outlook?
Follow the steps below to install your S/MIME certificate in Outlook and use it to digitally sign and secure your emails.
- Click on “Options” in “File.”
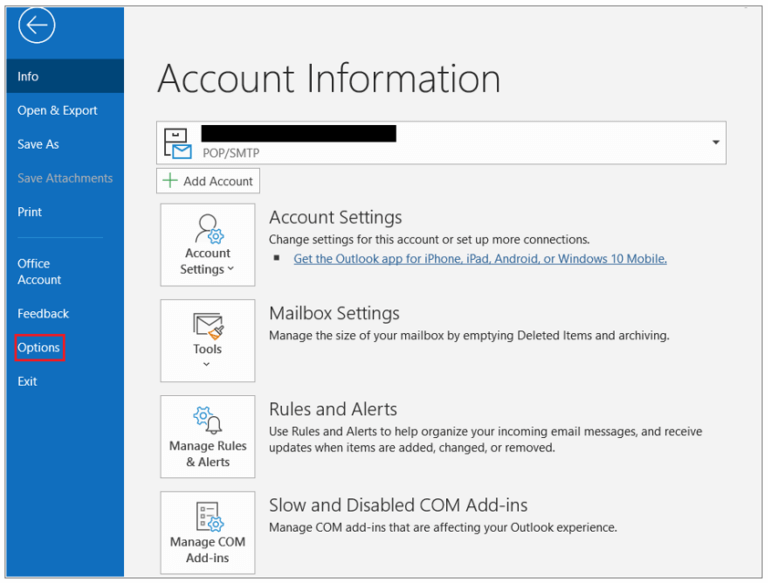
- You will now see the “Outlook Options” window. Here, go to “Trust Center” and select “Trust Center Settings.”
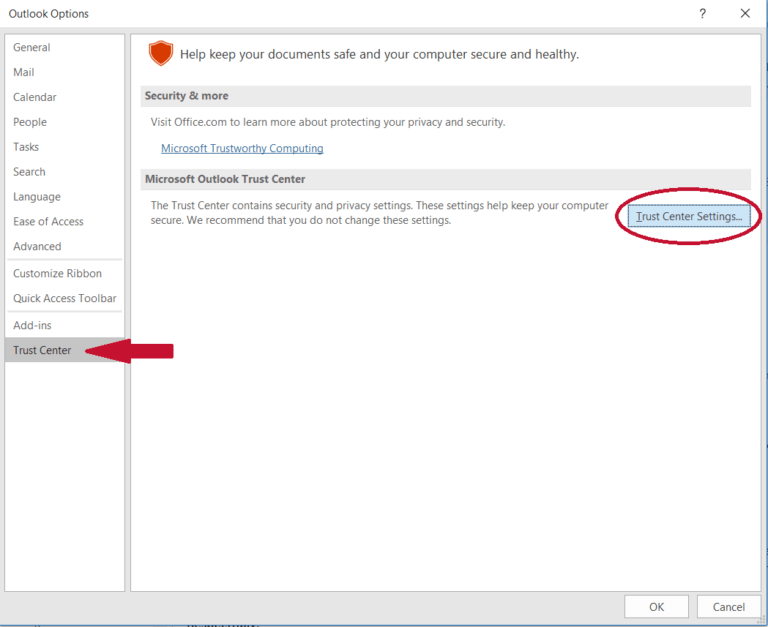
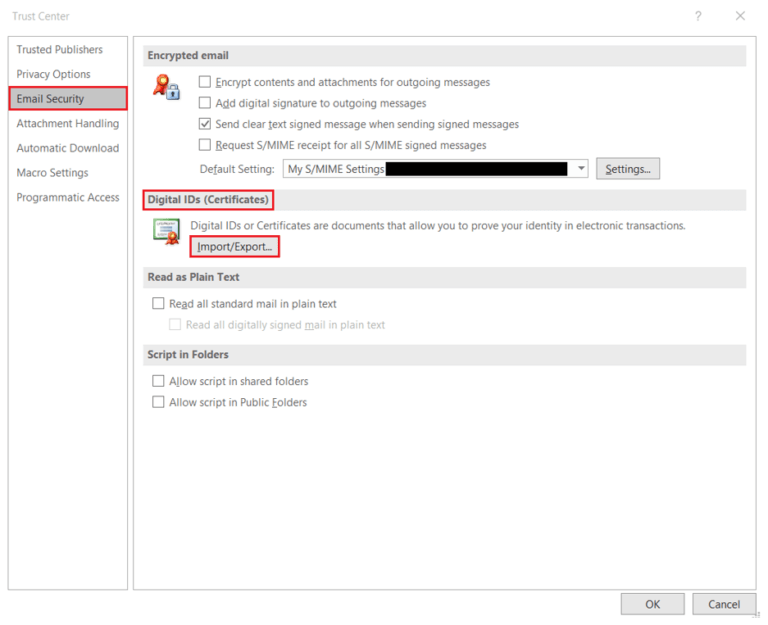
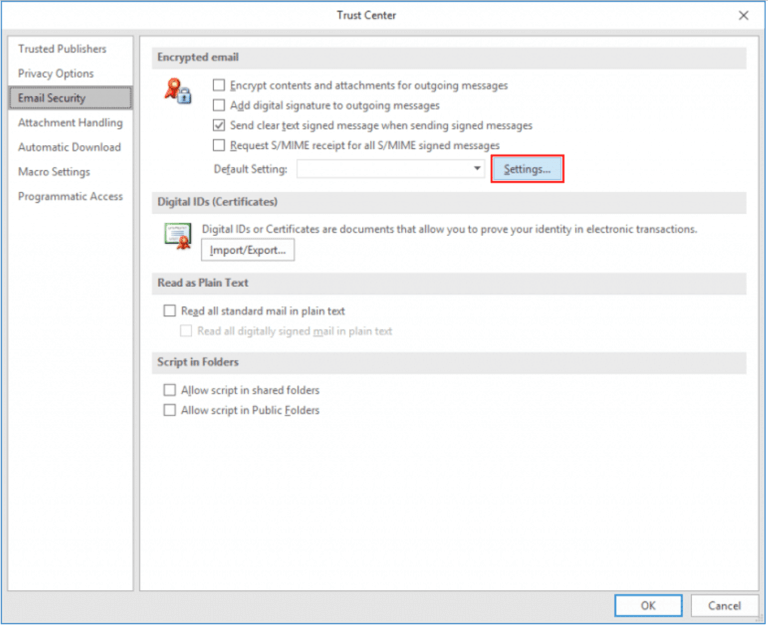
- Navigate to the “Email Security” tab in the “Trust Center” window.
- Click on “Import/Export” under the Digital IDs tab on the right.
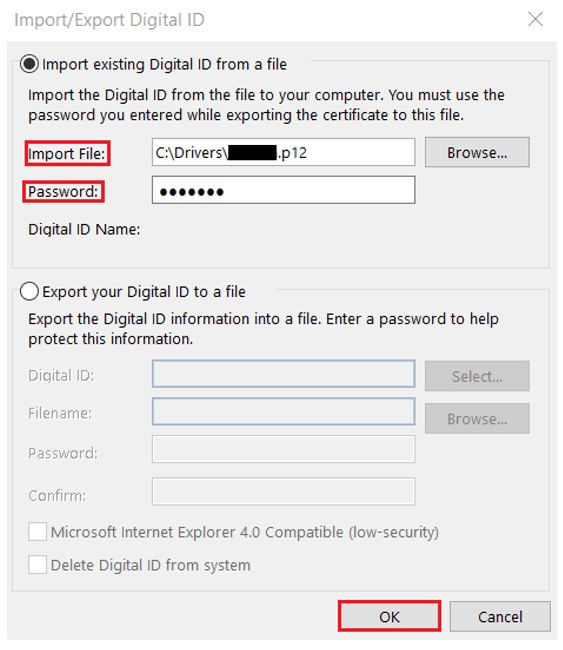
- Select “Import existing Digital ID from a file” in the window that opens.
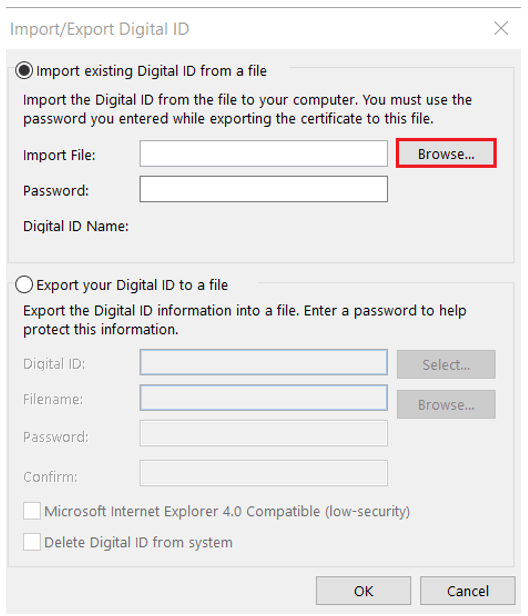
- Now, you will need to navigate to the location where you saved your file. Once you find the saved file, click on “Open.” Once you click on “Open,” you will see the name of the file path in the “Import File” field.
- Here is where you will have to enter the password. Click “OK“ once you enter the password.
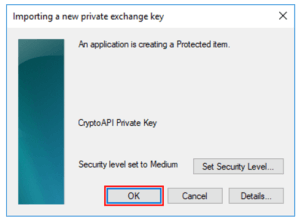
- In the dialogue box you see, click “OK.”
- Click on “Settings” under “Email Security.”
- You can name your security settings in the “Change Security Settings” window.
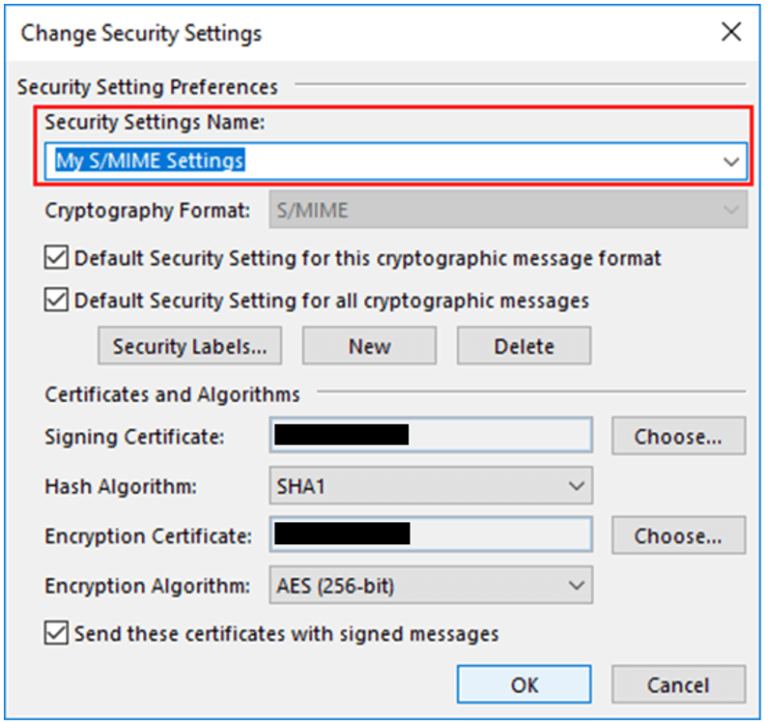
- Click “Choose” under “Certificates and Algorithms.” Now, your certificate will load. Followed by that, on the certificate window, click “OK”.
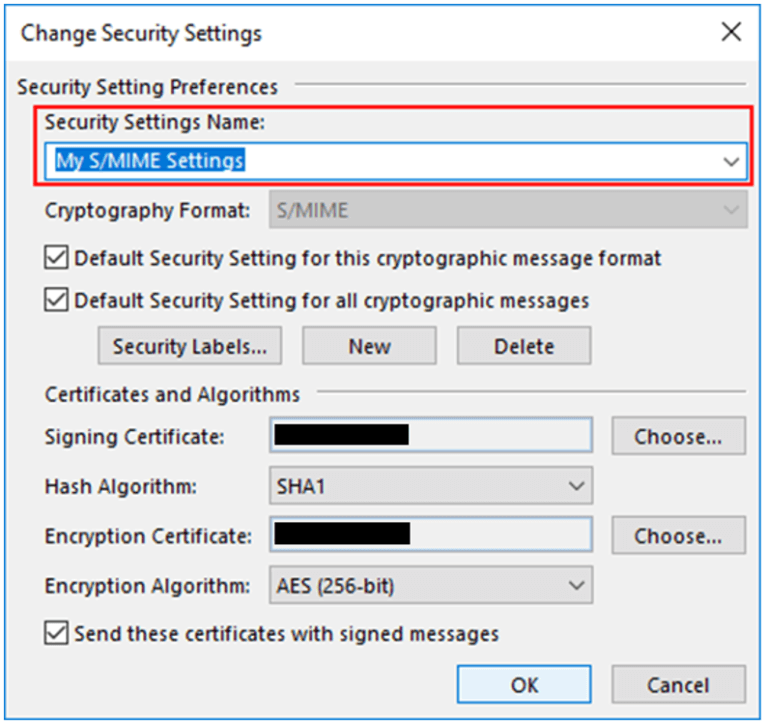
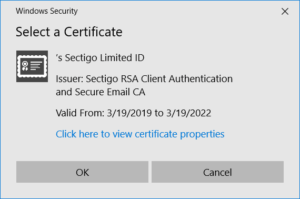
- Repeat the same step for the “Encryption Certificate” field and select the same certificate as you selected earlier.
- Under the “Encrypted email” tab, select the default options using the checkboxes.
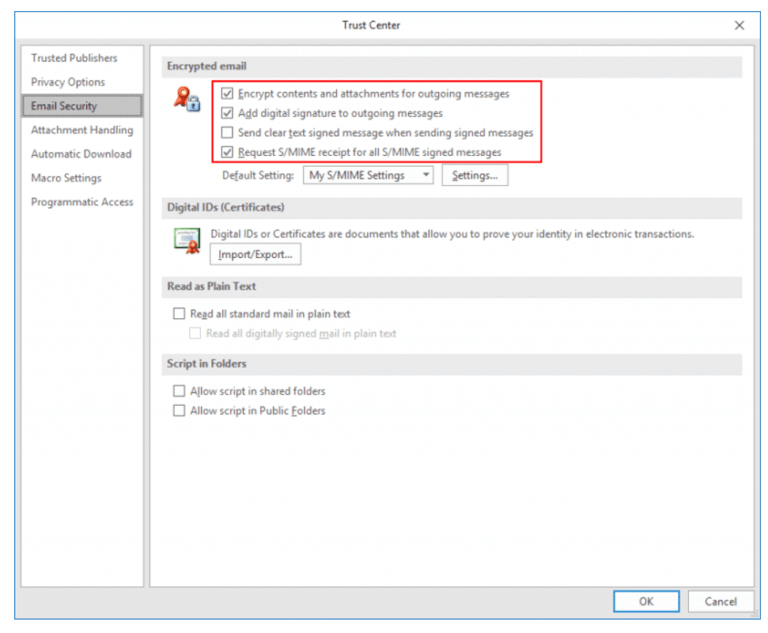
- Your certificate will be installed once you click “OK” and when the “Trust Center Window” closes.
- You are now all set to use your certificate.